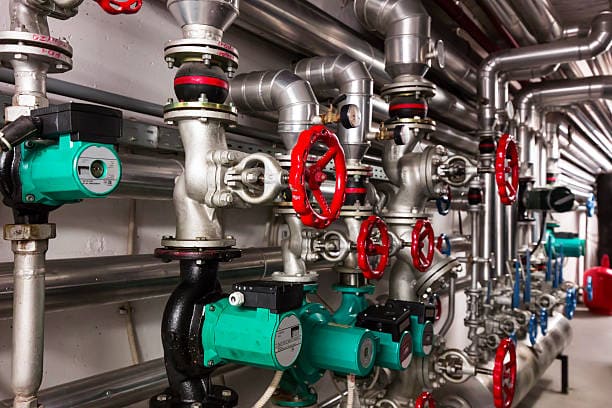
Valve actuators play a crucial role in controlling the operation of valves in various industries. Whether it’s in manufacturing plants, power generation facilities, or HVAC systems, the proper installation of valve actuators is essential for ensuring optimal performance. In this step-by-step installation guide, we will walk you through the process of installing valve actuators to help you achieve the best results.
1. Introduction
Valve actuators are devices that control the opening and closing of valves by converting electrical, hydraulic, or pneumatic energy into mechanical motion. These actuators are critical components in industrial systems, as they allow for precise control and automation of valves, ensuring efficient and reliable operation.
2. Understanding Valve Actuators
Before diving into the installation process, it’s important to have a clear understanding of valve actuators and their types. There are primarily two types of valve actuators: electric and pneumatic.
Electric actuators use electrical energy to drive the valve’s movement. They are commonly used in applications that require precise control, such as in the pharmaceutical and chemical industries. On the other hand, pneumatic actuators utilize compressed air or gas to operate the valves. They are often found in industries where quick and efficient valve movement is required, such as in oil and gas refineries.
3. Pre-Installation Preparations
Before installing the valve actuator, it’s crucial to gather all the necessary tools and equipment. These may include wrenches, screwdrivers, mounting brackets, control panels, and electrical cables. Additionally, review the manufacturer’s installation instructions and ensure that you have a clear understanding of the specific requirements for your valve actuator model.
4. Mounting the Actuator
To mount the actuator, follow these steps:
- Identify the appropriate location on the valve for actuator mounting.
- Attach the mounting bracket to the valve using the provided screws or bolts.
- Align the actuator with the mounting bracket and secure it in place.
- Double-check the actuator’s alignment to ensure smooth operation.
5. Wiring and Electrical Connections
Proper wiring and electrical connections are vital for the actuator’s functionality. Here’s a step-by-step guide:
- Connect the control panel to a power source, ensuring the appropriate voltage and current rating.
- Identify the actuator’s terminal connections and carefully attach the electrical cables according to the manufacturer’s instructions.
- Use wire nuts or terminal blocks to secure the connections.
- Verify the wiring connections for any loose ends or improper connections.
6. Calibrating the Actuator
Calibrating the actuator is essential to achieve accurate valve positioning. Follow these steps for calibration:
- Access the actuator’s control panel or interface.
- Set the desired open and closed positions for the valve.
- Initiate the calibration process according to the manufacturer’s instructions.
- Test the actuator’s movement and ensure it accurately corresponds to the desired positions.
7. Testing and Troubleshooting
After installation and calibration, it’s crucial to test the actuator’s performance and address any potential issues. Here are a few steps to follow:
- Trigger the actuator to open and close the valve using the control panel.
- Observe the valve’s movement and listen for any unusual sounds.
- Monitor the actuator’s response time and ensure it meets the desired specifications.
- If any issues arise, consult the troubleshooting section in the manufacturer’s manual or contact their technical support for guidance.
8. Maintenance and Regular Inspections
To ensure long-term performance and reliability, regular maintenance and inspections are necessary. Consider the following maintenance practices:
- Clean the actuator and surrounding area regularly to prevent the accumulation of dirt or debris.
- Lubricate moving parts as recommended by the manufacturer.
- Inspect electrical connections periodically for any signs of wear or corrosion.
- Keep a record of maintenance activities and schedule routine inspections to detect and address any potential problems promptly.
9. Conclusion
Installing valve actuators requires careful planning and execution to ensure optimal performance and longevity. By following this step-by-step guide, you should now have a solid understanding of how to install valve actuators correctly. Remember to refer to the manufacturer’s instructions specific to your actuator model and seek professional assistance if needed. Proper installation and maintenance will help you maximize the efficiency and reliability of your valve actuator system.
10. FAQs
Q1: Can I install a valve actuator myself, or do I need professional assistance?
It is possible to install a valve actuator yourself if you have a good understanding of electrical and mechanical systems. However, for complex installations or unfamiliar applications, it is recommended to seek professional assistance to ensure a safe and reliable installation.
Q2: How often should I perform maintenance on my valve actuator?
Regular maintenance intervals can vary depending on factors such as the operating environment and the actuator’s manufacturer recommendations. As a general guideline, perform visual inspections and basic maintenance tasks at least once every six months.
Q3: Can I use the same actuator for different types of valves?
In most cases, actuators are specifically designed for certain valve types and sizes. It’s essential to choose an actuator that is compatible with the specific valve you intend to control. Refer to the actuator’s specifications or consult the manufacturer for guidance.
Q4: What safety precautions should I follow during the installation process?
When installing valve actuators, ensure that the power source is disconnected, and all safety protocols are followed. Wear appropriate personal protective equipment (PPE), such as gloves and safety glasses, and work in a well-ventilated area.
Q5: How can I troubleshoot an actuator that is not functioning properly?
If your actuator is not functioning correctly, refer to the troubleshooting section in the manufacturer’s manual for guidance. Check for loose electrical connections, ensure proper power supply, and inspect for any mechanical obstructions that may hinder the actuator’s movement.


